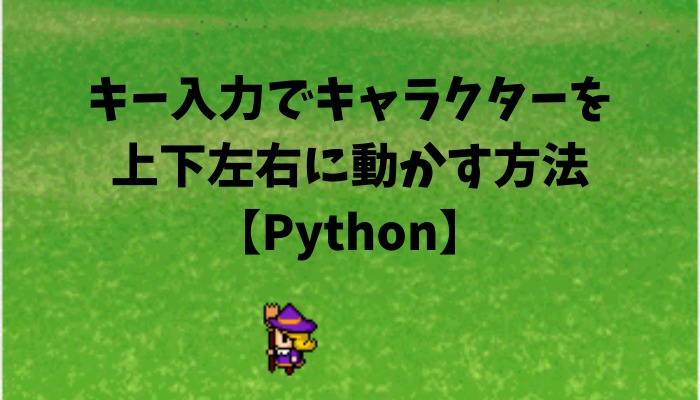
前回の記事で、キーボードの入力からプレイヤーを動かせるようにしました。
プレイヤーが動くのであれば、当然敵が出てくるのが必然です。
というわけで、今回は敵をフィールドに出現させて、衝突したらゲームオーバーと表示するようにしたいと思います。
当たり判定を実装し敵と衝突したらゲームオーバーと表示する
とりあえず敵を動かすことはせず、適当な位置に出現させてプレイヤーの操作で自ら敵に衝突してみようと思います。何でも構わないので敵となる画像を用意しておきましょう。
前の記事で作成した「playermove」スクリプトを開いて修正を行っていきます。
This file contains bidirectional Unicode text that may be interpreted or compiled differently than what appears below. To review, open the file in an editor that reveals hidden Unicode characters.
Learn more about bidirectional Unicode characters
import tkinter | |
px = 150 | |
py = 250 | |
key = "" | |
ani = 0 | |
ex = 150 #敵のx座標 | |
ey = 80 #敵のy座標 | |
scene = 0 #シーンを番号で管理する | |
fnt = ("Impact",30) | |
def key_down(e): | |
global key | |
key = e.keysym | |
def key_up(e): | |
global key | |
key = "" | |
def main(): | |
global key | |
move() | |
animation() | |
def animation(): | |
global ani,px,py | |
canvas.create_image(px, py, image=player[ani], tag="PLAYER") | |
def move(): | |
global px,py,key,ani,scene | |
canvas.delete("PLAYER") | |
if scene == 0: | |
if key == "Left" and px > 30: | |
ani = (ani+1)%3 + 3 | |
px = px - 5 | |
if key == "Right" and px < 270: | |
ani = (ani+1)%3 + 6 | |
px = px + 5 | |
if key == "Up" and py > 30: | |
ani = (ani+1)%3 | |
py = py - 5 | |
if key == "Down" and py < 250: | |
ani = (ani+1)%3 + 9 | |
py = py + 5 | |
move_enemy() | |
root.after(100,main) | |
if scene == 1: | |
canvas.delete("GAMEOVER") | |
canvas.create_text(150,150,text="GAMEOVER",fill="black",font=fnt,tag="GAMEOVER") | |
def move_enemy(): | |
global ex,ey,scene | |
if((px-ex)*(px-ex)+(py-ey)*(py-ey) < 32*32): | |
scene = 1 | |
root = tkinter.Tk() | |
root.title("プレイヤーの移動") | |
root.bind("<KeyPress>",key_down) | |
root.bind("<KeyRelease>",key_up) | |
canvas = tkinter.Canvas(width=300,height=300) | |
canvas.pack() | |
player = [ | |
tkinter.PhotoImage(file="majo_10.png"),#前0~2 | |
tkinter.PhotoImage(file="majo_11.png"), | |
tkinter.PhotoImage(file="majo_12.png"), | |
tkinter.PhotoImage(file="majo_04.png"),#左3~5 | |
tkinter.PhotoImage(file="majo_05.png"), | |
tkinter.PhotoImage(file="majo_06.png"), | |
tkinter.PhotoImage(file="majo_07.png"),#右6~8 | |
tkinter.PhotoImage(file="majo_08.png"), | |
tkinter.PhotoImage(file="majo_09.png"), | |
tkinter.PhotoImage(file="majo_01.png"),#下9~11 | |
tkinter.PhotoImage(file="majo_02.png"), | |
tkinter.PhotoImage(file="majo_03.png") | |
] | |
enemy = tkinter.PhotoImage(file="obake_01.png") | |
bg = tkinter.PhotoImage(file="field2.png") | |
canvas.create_image(150,150,image=bg) | |
canvas.create_image(ex,ey,image=enemy) | |
main() | |
root.mainloop() |
こちらが修正したスクリプトになります。
シーンの切り替えは行いませんが、タイトル、メイン、ゲームオーバーなどの各シーンを管理するためのscene変数を作りました。
このスクリプトで言うと0ならゲームプレイ中、1ならゲームオーバーとなります。
シーン変数が0ならキーボードの入力により操作が可能なので、move_enemy関数でプレイヤーと敵の当たり判定を行います。
当たり判定を行う式は、円における判定方法を使用しています。ルートを使っても良いんですけど、mathモジュールをインポートする必要があるので、このような記述にしています。
プレイヤーと敵それぞれ「32px×32px」の画像を使っているので32ドット未満になったら当たりとみなしてシーン変数を1に変えて中央にゲームオーバーとテキストを表示します。
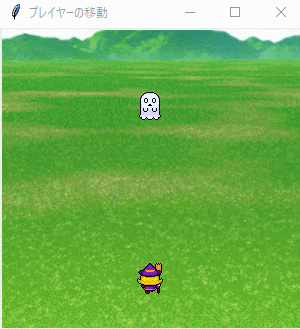
実際にゲームを実行してみます。
画面上部に堂々と待ち構えている敵にぶつかってみましょう。ゲームオーバーとなってキー入力が無効になればOKです。次回は敵の動きについて考えていきます。